WALDENT 3 WAY SYRINGE - WITH TWO AUTOCLAVABLE TIPS
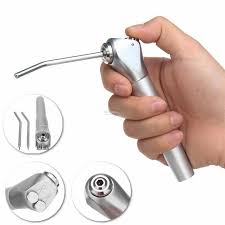
WALDENT 3-way syringe has 2 nozzles in a box controlled by 2 buttons. The Left Button Controls the Water Flow Volume, the Right Button Controls the Air Flow Volume. Pushing both buttons at the same time generates a mist. WALDENT 3-Ways Syringe features an O-ring groove that secures tip-lock for patient safety and eliminates leakage. The angle in the tip provide an ideal placement of the tip anywhere in a patient’s mouth, and is strong enough to allow for retraction.
The box and hosuing is made of Premium Quality Stainless Steel. The handle is made of Hight Quality aluminium. with smooth styling that fits comfortably in your hand. The package includes 2 Autoclavable tips.
INTSALLATION GUIDE
While installing the 3-Way Syrige onto your dental chair shut your unit off and press both buttons of your existing syringe until all flow stops. Unscrew the syringe handle and cut the tubing as close as possible to the syringe head.
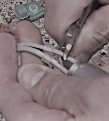
Discard the old syringe and handle. Trace the lines of the syringe tubing to identify which is air and which is water. Once the lines are separated and trimmed, they are ready to be pushed on to the barbs of the syringe.
Unscrew the handle from your new syringe and slide the handle over the tubing. Next, attach the air and water lines of the syringe tubing to the barbs on the syringe head. The water line will attach to the left-hand button (when looking at the back of the syringe head) and the air line to the right-hand side. Attach the water line first (the sleeve clamp is pushed farther onto the tubing) by sliding it over the barb.
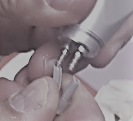
You can dip the end of the tubing in hot water and/or lubricate the barb with some silicone lubricant to make it easier to slide the tubing on. You’ll want to slide the tubing only about 1/2-3/4 of the way on. Once the water line is attached you can then attach the air line using the same procedure. After both lines are attached to the barbs, use a plier to push the tubing, the rest of the way onto the barbs when they are seated.
Slide the syringe handle up and hand-tighten it onto the head. Turn your unit on and test the syringe for function. Put the cover back on your unit and your chair got a new syringe!