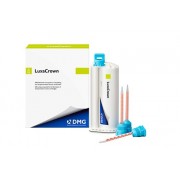
LuxaCrown is very hard with a Barcol hardness of 54. In addition to excellent flexural strength, it also possesses outstanding fracture toughness which ensures long-term stability of semi-permanent restorations. Several in-vitro studies have confirmed its high mechanical strength. Standardized chewing and wear simulations of masticatory behaviour with artificial aging verified a lifespan of up to 5 years for LuxaCrown
The practical Automix system guarantees a quick, clean and productive application. Eight shade variations open up a variety of creative possibilities, even for the highest aesthetic demands.
With LuxaCrown Dentists can offer their patients a long-lasting semi-permanent solution with excellent results – and a cost-effective, attractive alternative to laboratory fabricated crowns.
LuxaCrown restorations are ideally suited for the elderly who do not want to invest in more expensive longer lasting restorations, patients with a limited budget and children requiring a space maintainer following tooth loss.
INDICATION:
Crown restorations:
Bridge restorations:
1 . Before preparation of crowns or bridges, take an impression using alginate, silicone or a thermoplastic impression material. Alternatively, the temporary can be made using a laboratory-prepared thermoforming matrix. Strictly follow the appropriate manufacturer’s instructions.
Note: In a silicone impression, undercuts should be compensated for and, if necessary, relief channels should be cut.
2. Dry the prepared teeth and compensate for any undercuts present in the preparation.
3. Lightly coat the prepared teeth, surrounding tissue and any present composite core buildups with Vaseline or a similar separating agent.
Note: The convergence angle must be kept as small as possible in the preparation. Ensure an appropriate connector cross-section with splinted crowns and bridges.
4. Select the desired LuxaCrown shade.
5. Fill the impression with LuxaCrown. Start by applying the material to the occlusal surfaces and fill up working toward the gingival areas. Keep excess material to a minimum. Note: To avoid bubbles, keep the mixing tip immersed in the material throughout application.
6. After a maximum time period of 0:40 minutes from the start of mixing, place the filled impression with moderate pressure on the prepared teeth and fix.
7. Monitor the setting process intraorally (e.g. with a probe), as the curing process is influenced by the temperature in the mouth and as it is recommended to take off the restoration during the elastic phase.
8. Remove the restoration from the mouth during the elastic phase, i.e. in the time period from 1:45 to 2:20 minutes after the start of mixing.
9. Remove the oxygen inhibition layer at the surface of the restoration (e.g. with alcohol). Caution! Grinding dust can get in the eyes and airways when working on or finishing the restoration. ? Wear a face mask and protective goggles. ? Make sure that grinding dust is properly extracted – do not breathe it in.
10. About 5:00 min after the start of mixing, finish the restoration using cross-cut burs, flexible discs, etc.
11. If necessary, coat the surface of the restoration with a light-curing high-gloss glaze (e.g. Luxatemp-Glaze & Bond) or manually polish it with a rubber polisher or small goat hair brush and a suitable polishing paste
12. Thoroughly clean the preparation with water spray, dry it and thoroughly remove the separating medium. In doing so, ensure that the dentine retains a little residual moisture and does not become too dry
13. Slightly roughen the inner crown surfaces with a bur or sand blaster
14. Cement the restoration using a suitable permanent or temporary cement (e.g. PermaCem 2.0, TempoCem). Observe the manufacturer’s instructions. Note: Cements that contain eugenol may prevent the polymerization of resin-based luting cements during the definitive cementation
15. Check the occlusion and adjust accordingly.


